KidKare SSO Migration Guide
This guide walks you through migrating your organization from KidKare native login (username/password) to Single Sign-On (SSO) using your Azure AD identity provider.
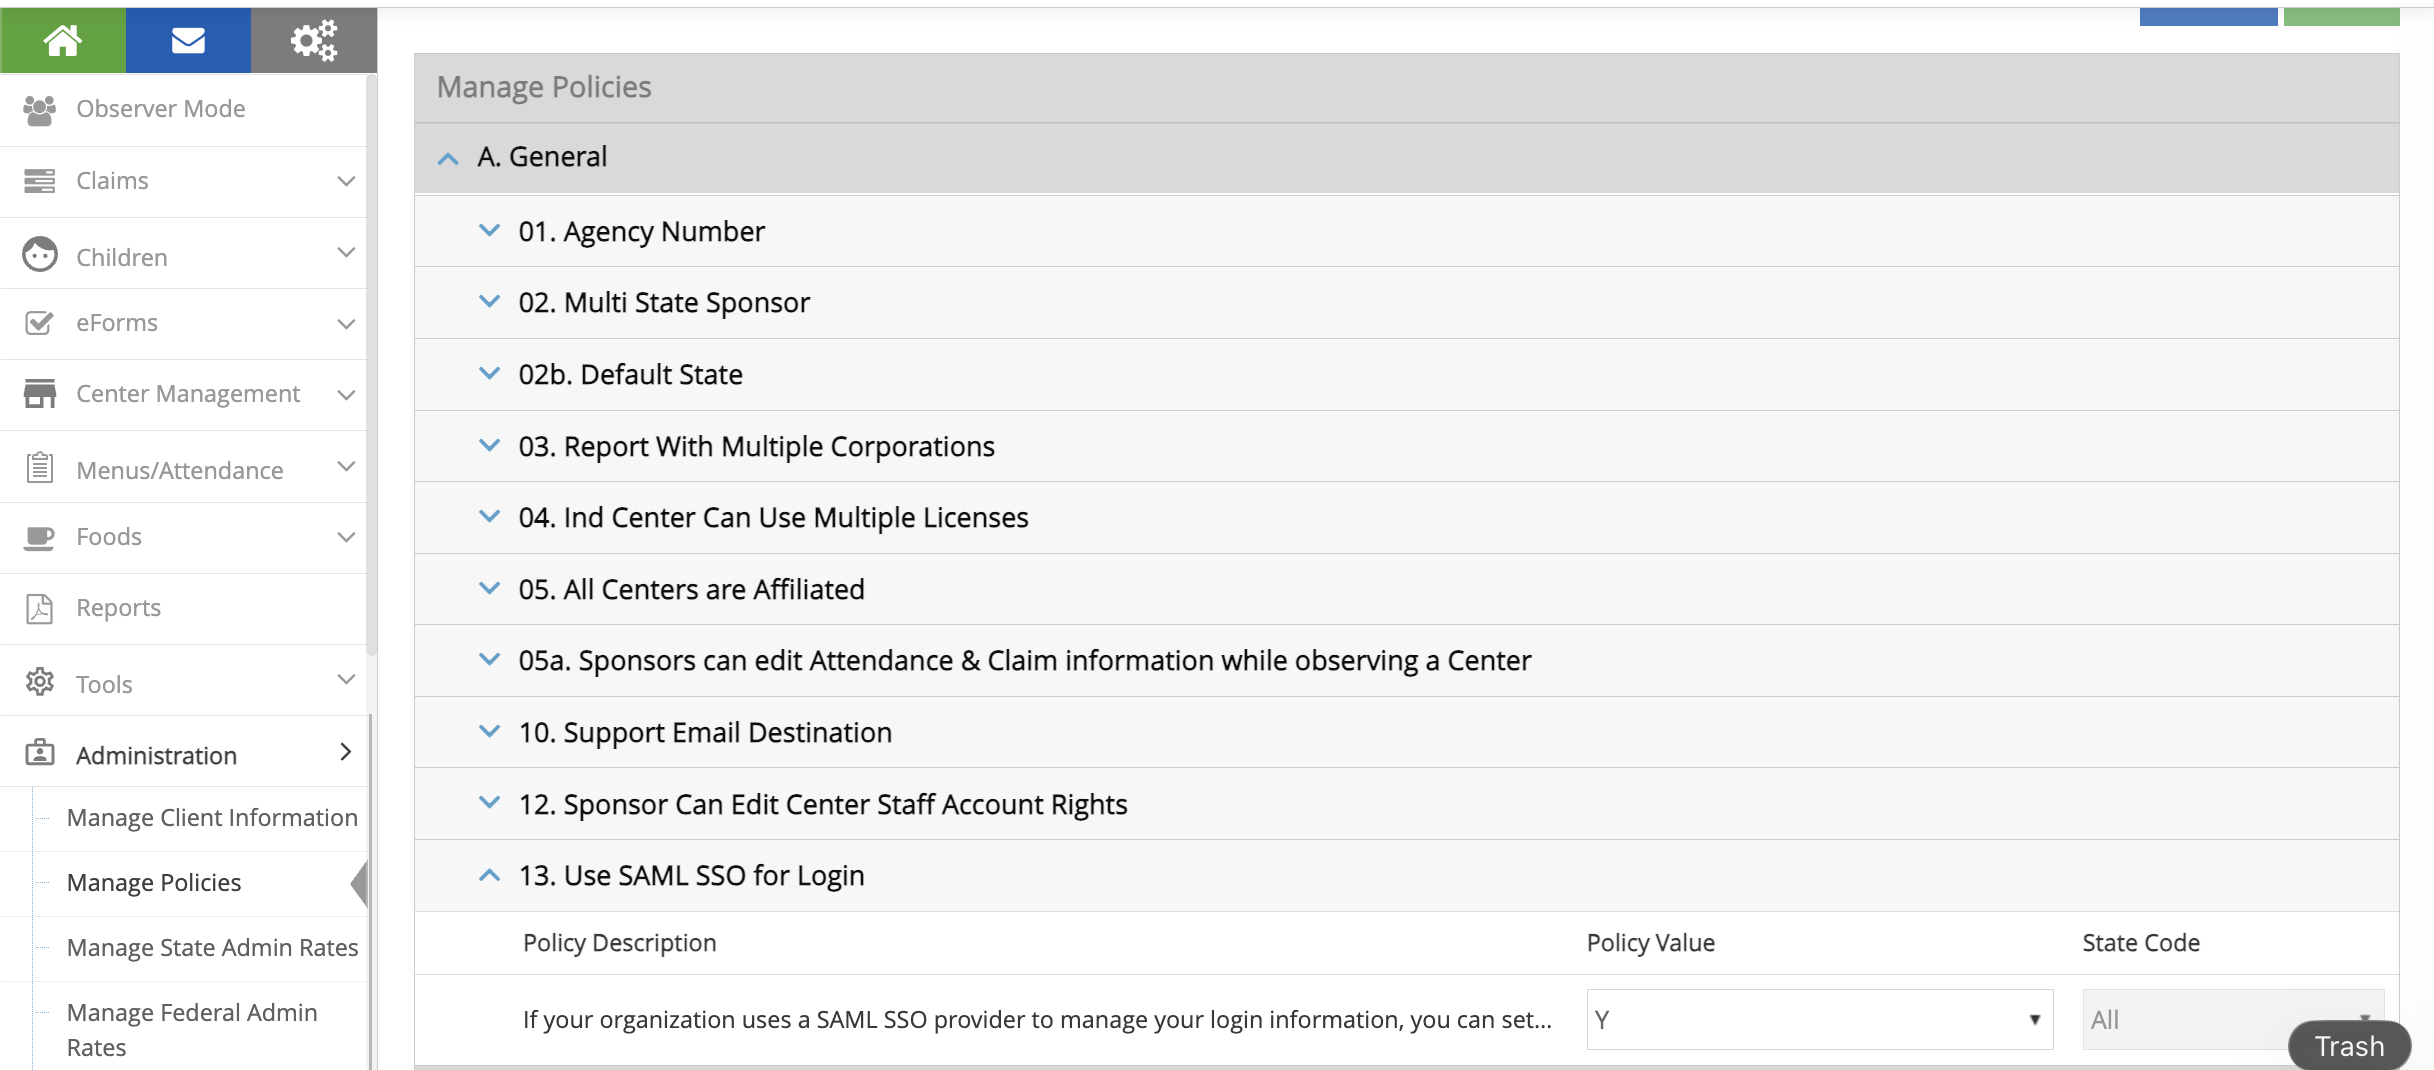
Step 1: Enable Policy A.13
- Log in as a Sponsor Admin
- Go to Administration > Manage Policies
- Find policy A.13 (
USE_SAML_SSO_FOR_LOGIN) - Set the value to Y
- Click Save
This makes the Federated SSO Configuration menu visible under Administration.
Step 2: Configure Your Azure SAML App
In Azure Portal > Entra ID > Enterprise Applications > [Your App] > Single sign-on:
Basic SAML Configuration
| Field | Value |
|---|---|
| Identifier (Entity ID) | https://api.kidkare.com/ssoservice |
| Reply URL (ACS URL) | https://api.kidkare.com/ssoservice/auth/federated/callback |
Attributes & Claims
Important: Click Edit on Attributes & Claims. Click on Unique User Identifier (Name ID). Change the source attribute from
user.userprincipalnametouser.mail. Save.This is required. The default
user.userprincipalnamewill not work with KidKare.
SAML Certificates
- Download the Certificate (Base64) file
- Note the certificate expiration date
Copy These Values (you'll need them in Step 3)
| Azure Field | KidKare Field |
|---|---|
| Login URL | IdP SSO URL |
| Azure AD Identifier | IdP Entity ID |
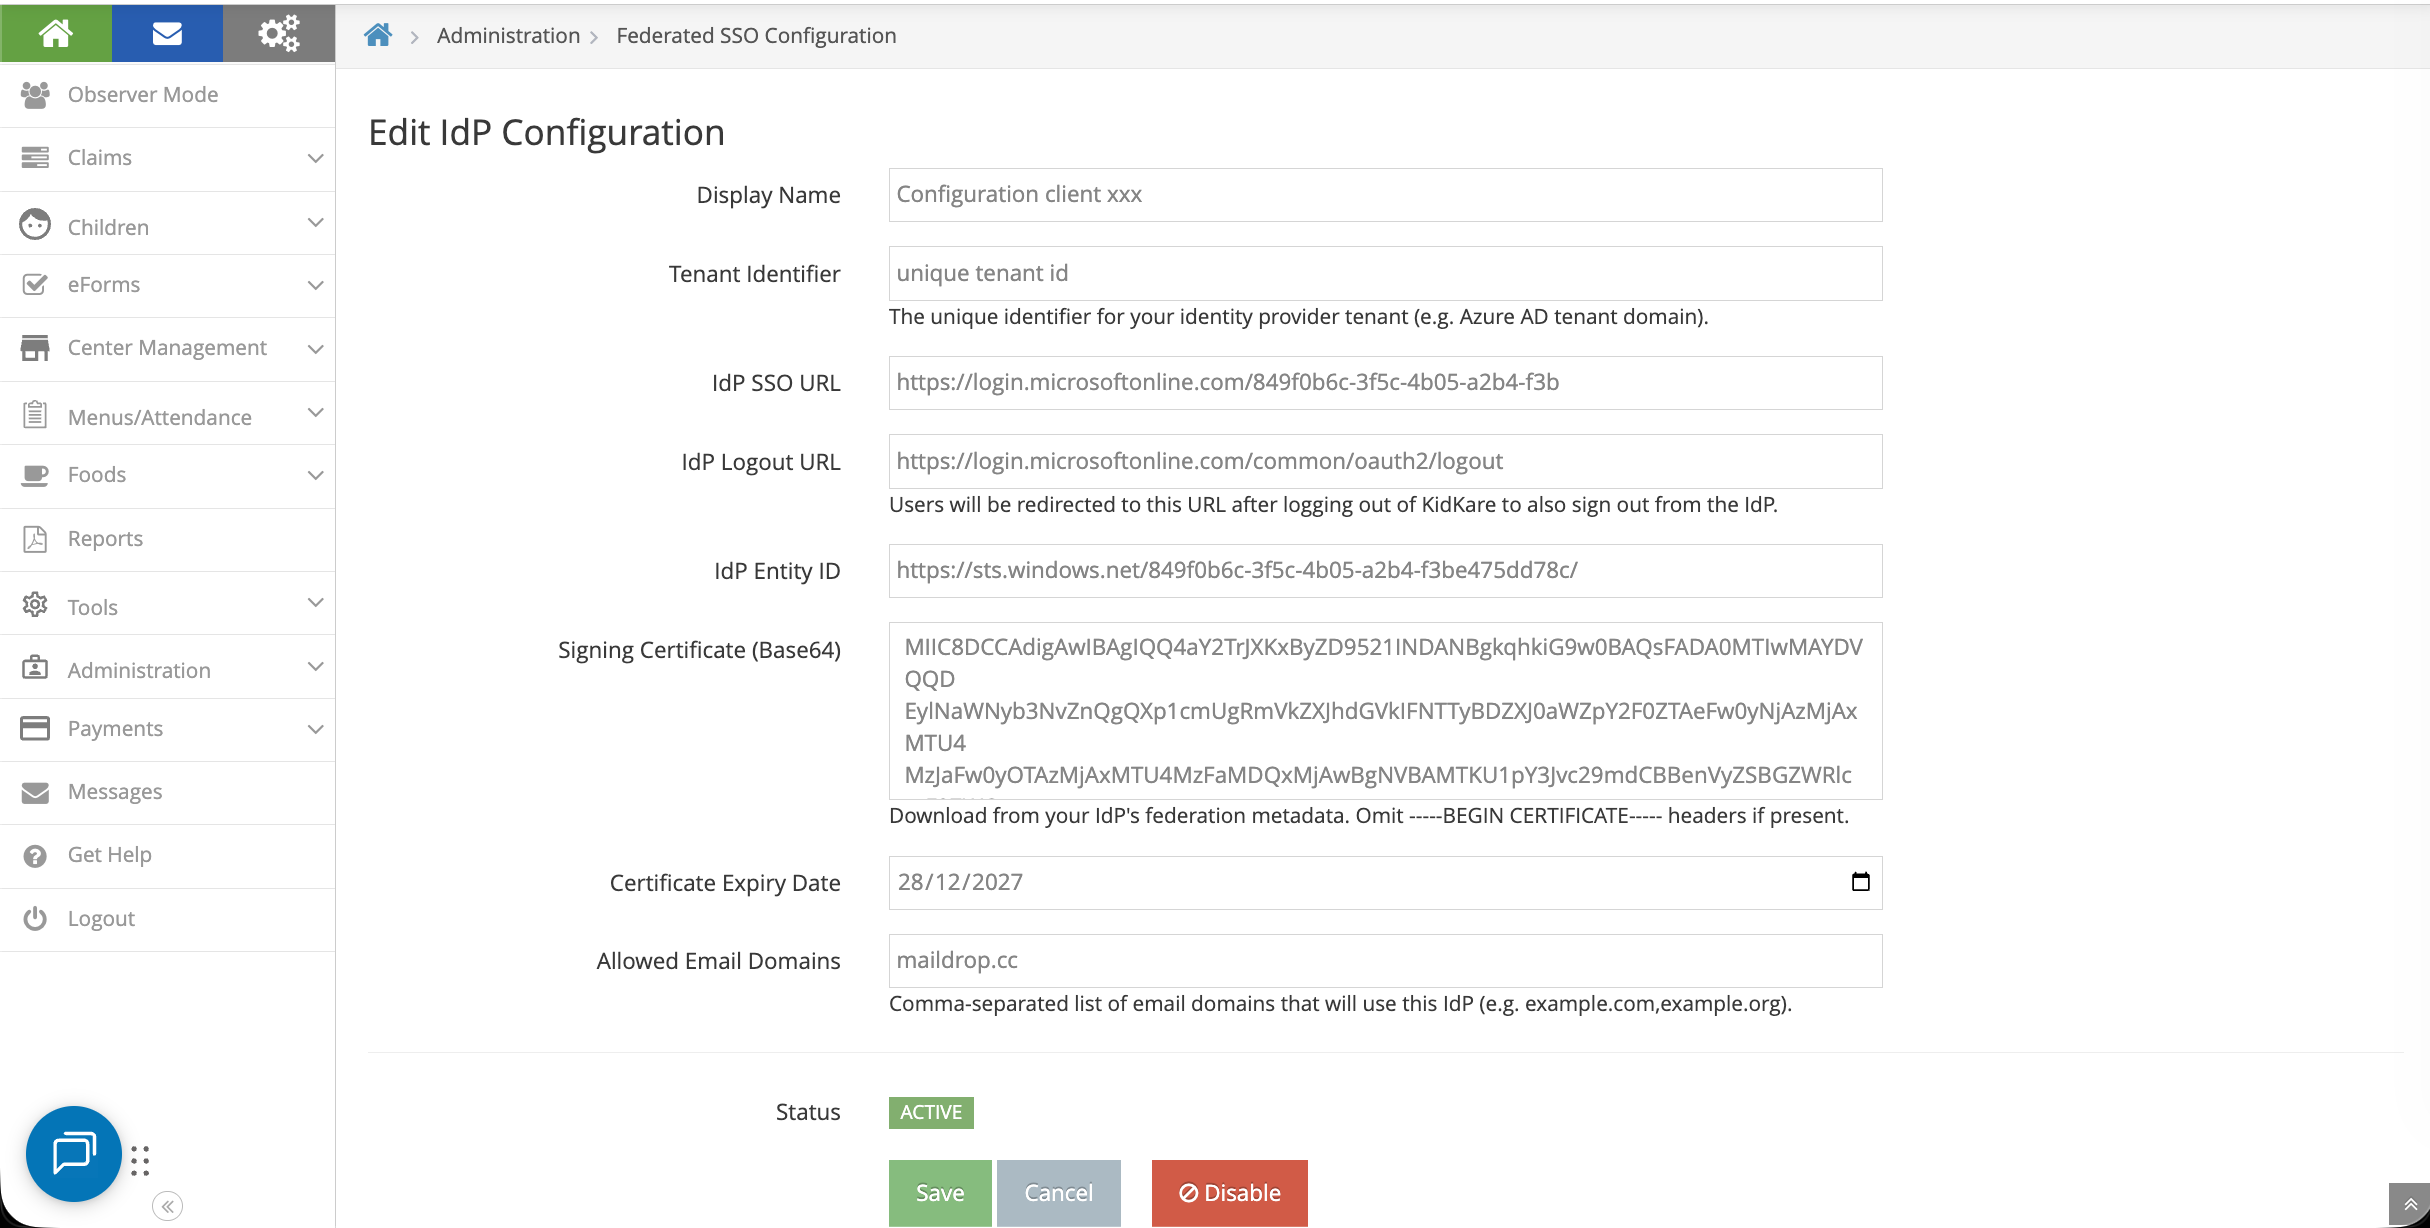
Step 3: Update IdP Configuration in KidKare
Go to Administration > Federated SSO Configuration
Fill in the form:
| KidKare Field | Where to Get It |
|---|---|
| Display Name | Your choice, e.g., "Contoso Azure AD" |
| Tenant Identifier | Unique |
| IdP SSO URL | Login URL from Azure (Step 2) |
| IdP Logout URL | https://login.microsoftonline.com/common/oauth2/logout |
| IdP Entity ID | Azure AD Identifier from Azure (Step 2) |
| Signing Certificate (Base64) | Open the downloaded .cer file in a text editor, copy the content between the BEGIN and END lines |
| Certificate Expiry Date | From Azure certificate section |
| Allowed Email Domains | Comma-separated list of your email domains, e.g.,contoso.com |
Click Save.
Step 4: Enable SSO
- Click the Enable SSO button on the configuration page
-
The system will automatically:
-
Test the connection to your identity provider
- Validate all existing users
- Review the user lists:
| List | Meaning |
|---|---|
| Users already configured for SSO | Ready to go, no changes needed |
| Users to be migrated | Their username will change to their email |
| Users that will be disabled | No valid email found — they won't have SSO access |
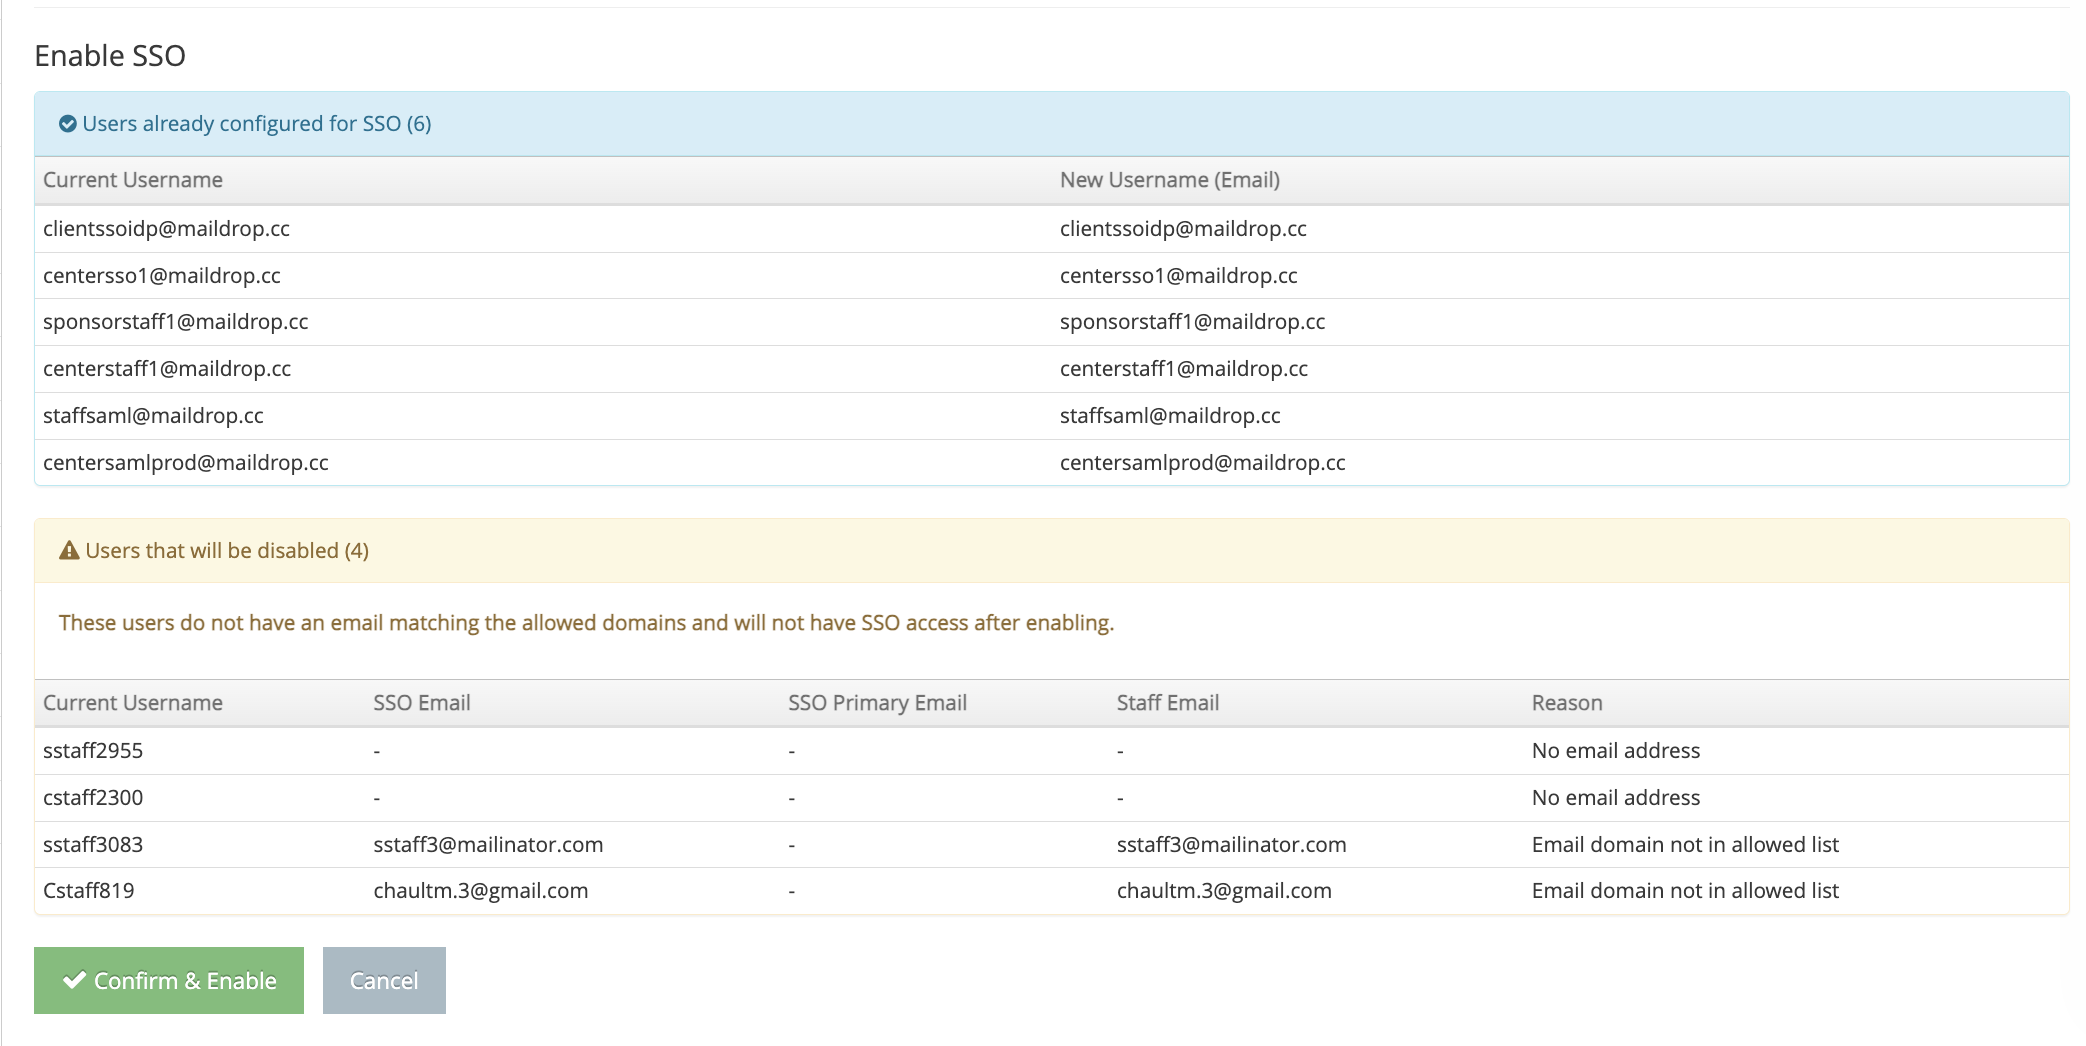
Recommendation: Before clicking "Confirm & Enable", review the "disabled" list. Add valid email addresses to those users first so the migration goes smoothly. You can cancel, update the users, then click Enable SSO again.
- Click Confirm & Enable when ready
Adding New Users After SSO Is Enabled
New staff members added after SSO is enabled automatically get SSO access:
- Add a new staff member through Manage Centers > [Center] > User Permissions
- Use an email that matches your allowed domains
- The system automatically sets them up for SSO login
- They receive an invitation email with instructions to log in using their corporate credentials
How to Revert to Native KidKare Login
If you need to switch back to username/password login, there are two ways:
Option A: Disable the IdP Configuration
- Go to Administration > Federated SSO Configuration
- Click Disable on the active configuration
Option B: Disable Policy A.13
- Go to Administration > Manage Policies
- Set policy A.13 to N
- Click Save
Both options will return all users to username/password login. Users who were created during the SSO period (never had a KidKare password) will need to:
- Go to the login page
- Click Forgot Password
- Set a new KidKare password
You will receive an email listing these users so you can notify them.